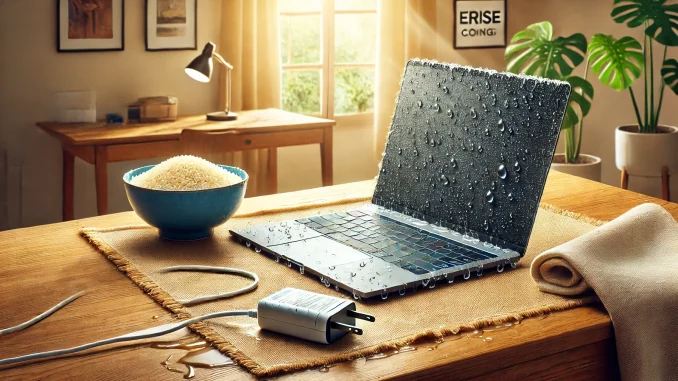
Accidents happen, and one of the most alarming situations for any laptop user is when a laptop charger gets wet. Whether it’s a spill, rain, or unfortunate submersion, water and electronics don’t mix. However, knowing the right steps to take immediately after your charger gets wet can prevent permanent damage, ensure safety, and potentially save you from costly replacements.
In this guide, we will walk you through what to do if your laptop charger gets wet, the dangers of using a wet charger, and the best practices to protect both your charger and laptop. Acting quickly and decisively is essential in these situations to minimize the risks and prevent further damage.
Why You Should Never Use a Wet Laptop Charger
Before we dive into the steps to take, let’s first understand why you should never attempt to use a wet charger. Water is a conductor of electricity, and using a wet charger can result in a short circuit, cause sparks, or even lead to dangerous situations like electric shocks or fires. The components inside the charger may be affected by moisture, leading to permanent damage that compromises the charger’s functionality.
Attempting to plug in a charger that hasn’t been properly dried can also damage the laptop’s internal components. Moisture entering the charging port or the laptop’s circuitry can result in corrosion, short-circuits, or irreversible hardware failure.
Steps to Take When Your Laptop Charger Gets Wet
1. Disconnect the Charger from Power Immediately
The very first thing you should do when your laptop charger gets wet is to disconnect it from the power outlet. This step is crucial to prevent any electrical surges or potential short circuits. If the charger is still connected to your laptop, remove it carefully without turning on any power source. Make sure you are using dry hands or a cloth when handling the wet charger to avoid any risk of electrocution.
Once disconnected, keep the charger away from any power source until it has been thoroughly dried and inspected.
2. Shake Off Excess Water
After unplugging the charger, gently shake off any excess water from both the adapter and the cable. Make sure to hold the charger carefully, ensuring that no water gets into any open connections or ports. The key is to remove as much visible moisture as possible at this stage.
If the charger was submerged in water, consider patting it dry with a soft towel or cloth, focusing on drying the areas around the charging brick and connectors. Take care not to use excessive force, as this could push water deeper into the charger’s internal components.
3. Inspect the Charger for Damage
Once the excess water has been removed, inspect the charger thoroughly. Look for any visible signs of water inside the adapter or cable. Check if the charger is still wet in any crevices, and be on the lookout for signs of damage such as:
- Corrosion on metal parts
- Discoloration or spots on the cable
- Rust around the charging port
- Any noticeable cracks or breaks in the adapter housing
If the charger shows signs of damage, do not attempt to plug it in. In this case, it may be safer to replace the charger entirely, as any internal water damage could compromise its integrity.
4. Use a Drying Method
After shaking off the water and inspecting for damage, it’s time to fully dry the charger. Here are several methods you can use to remove moisture from your charger:
A. Air-Drying
The safest and most effective way to dry your charger is by air-drying it. Place the charger in a well-ventilated room and leave it for at least 48 hours. Ensure that both the adapter and the cables are spread out to allow air circulation. Avoid placing the charger in direct sunlight, as excessive heat can damage the internal components.
B. Rice or Silica Gel
A popular method for drying electronics is to place the wet device in a bowl of uncooked rice or silica gel packets. These materials help to absorb moisture effectively. Place your charger in a sealed container filled with rice or silica gel and leave it for 24-48 hours. This method can be useful, but ensure that the rice doesn’t get inside the charger’s ports, as this can lead to further complications.
C. Use a Hair Dryer with Caution
If you’re in a hurry, you can use a hair dryer on the lowest heat setting to blow-dry the charger. Be sure to maintain a safe distance to avoid overheating the charger, which could cause internal damage. The goal here is to circulate air around the charger, drying it without applying excessive heat directly to it.
5. Check for Residual Moisture
Before reconnecting the charger to your laptop or a power source, thoroughly check for any residual moisture. Any remaining water could result in short circuits or damage. Carefully inspect the charging brick, cables, and connectors for any signs of dampness.
If any parts still feel damp, continue the drying process. Patience is key here, as even the slightest amount of moisture could cause problems when the charger is reconnected.
6. Test the Charger Carefully
Once you’re confident that the charger is completely dry, you can proceed with caution to test the charger. Start by plugging the charger into a wall outlet (without connecting it to your laptop). Watch for any signs of malfunction, such as sparks, unusual sounds, or burning smells. If you notice any of these issues, unplug the charger immediately.
If no issues arise, the next step is to connect the charger to your laptop. Ensure that both the laptop and charger are in working condition before using the charger for extended periods.
7. Monitor the Charger for Ongoing Issues
After testing, it’s important to monitor the charger for any signs of long-term damage. This could include:
- Inconsistent charging: The laptop charges intermittently or stops charging entirely.
- Overheating: The charger becomes unusually hot during use, which can indicate internal damage.
- Weird noises: Any strange noises such as buzzing or hissing from the charger.
- Slower charging speed: If the charger takes longer to charge your laptop than usual, this could be a sign of reduced functionality.
If you encounter any of these issues, it’s best to replace the charger entirely. A damaged charger can lead to further problems for your laptop and may even pose a safety hazard.
Preventing Future Accidents: Tips for Protecting Your Laptop Charger
While it’s impossible to predict every accident, there are several preventive measures you can take to avoid the risk of wet chargers in the future:
- Keep Liquids Away: Always keep your laptop and its accessories away from water, beverages, and other liquids.
- Use a Protective Case: Consider using a protective case or bag for your charger when transporting it. This helps keep the charger safe from accidental spills or exposure to rain.
- Be Mindful of Storage Locations: Avoid placing your charger in areas prone to spills, such as the kitchen, bathroom, or outdoors during rainy weather.
Taking these precautions can significantly reduce the chances of damaging your charger with water and ensure a longer lifespan for your laptop accessories.
Conclusion
When your laptop charger gets wet, immediate action is crucial to prevent further damage and avoid dangerous situations. Disconnecting the charger, drying it properly, and carefully testing it afterward are essential steps to ensure safety. With the right approach, it is possible to restore your charger to full functionality, but in cases of severe water damage, replacing the charger may be the safest option.
You might also like:


Be the first to comment